Supplies:
6 x 6 piece of card stock or designer paper, scissors, adhesive, Envelope Punch Board and embellishments.
Step 1:
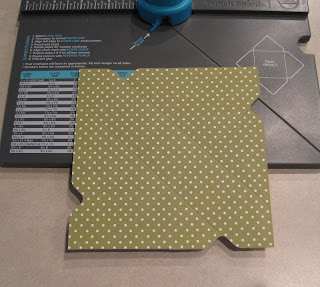
Place 6x6 piece of designer paper or card stock at 1 1/2 inch marker. See right photo for close up. Punch and score all the way down
Step 2:
This is what it should look like. Turn card stock 45 degrees and punch and score at the same 1 1/2 marker on all four sides of card stock. The photo on the right will be final result.
Step 3:
Turn card stock over. You should see the valley you punch to the right along the measurements panel. Place card stock at 1 1/2 inch marker as you did for the other side, punch and score. You will do the same to all four sides as you did the first side. The photo on the right is what the end result will look like. Pre-fold all score lines
Step 4:
Cut along the thinner inner panel towards the square in the center. This will form the sides of the basket. See photo as I have one side turn up to see the cut lines. Decide if using designer paper which side you want as the inner part of the basket and the outside. I want this side as the outer part of the basket
Step 5:
This part that is hard to see in the photo, sorry about that. The tip of the score tool is where I have added glue dots in the corner. You want to add glue dots to the four pieces on each side. I have the two right sides glue dots adhered to them. See photo on the right. You will over lap these two pieces and adhere them together. I basically lined up the top edges and formed the triangle you see at the bottom.
Step 6:
When both sides are glued together this is what it should look like. Now fold the side flaps up and over and adhere to the inside of the basket. The photo on the right is what it will look like. Add handle as desired and finish decorating
Step 7:
Final basket with little carrot chocolates insides for table decoration. The flower is Simply Camillas that is cut out in three layers and up on dimensionals. Enjoy


No comments:
Post a Comment