Monday, June 29, 2015

Oh Snap...

Happy Monday! A quick and fun House Mouse card for you today using Muscle Mouse. I think this one is retired now?? He is a favorite of mine, he makes me giggle.  ;-)  He is stamped on white card stock and colored with Copics. A simple gingham backing with a snipped end. Button in the corner and voila!  See... easy today.


Going to enjoy this 110 degree heat we have with the kids. Have a wonderful day! 


Friday, June 26, 2015

Pencil me in Jeremiah

Happy Friday! Over at Power Poppy we are still playing with our Pencils in the Pencil Me In Challenge. All the details can be found HERE on the PP Blog. 

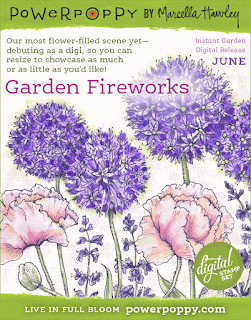
Now I have to admit that colored pencils and me are not a usual medium as they are typically a softer shade and I like the bold and bright. However today the new Garden Fireworks was perfect for some softer colors or at least as soft as I can get. hee hee  


My Garden Fireworks are colored with non other than the Crayola Pencils that I have on the desk. yep... good ole Crayola never lets me down. That and the fact I can't seem to find the few Prisma Color Pencils I have. They are lost in this room, which means I probably need to clean it up a bit. EEK.. Anyways, that is another story. The inside of my card is using the Scripture that comes with the digi and a family favorite Jeremiah 29:11. Below is the inside of my card. Voila! 


Wednesday, June 24, 2015

Fathers day tool time

Here is one of the Father's Day cards I made this weekend. My new ODBD Dies came called Workshop Tools with  are a perfect match to the Happy Father's Day stamp set I have already. After my image was stamped and colored with Copics, a simple faux stitching around the border. My sentiment is on some vellum paper with my tools to the left. The background paper is from the new Vintage Ephemera collection with more faux stitching. Voila! 


Thanks for stopping in with me today. ;-)

Monday, June 22, 2015

Card with attached Bookmark


Step 1

Form a 4 1/4 x 11 card base of solid color card stock. Score at 4 1/4 and 8 1/2 length wise


Step 2

Take a piercing tool and pierce holes down the 8 1/2 inch score line as shown. This will be your perforation for the bookmark to tear off from the card base


Step 3

Fold the bookmark panel inside the card as we will work with the front of card base. Add designer paper or any other card stock to the front as shown. Measuring the darker cardstock at 4 x 5 1/2. Designer paper at 3 3/4 x 4 3/4. Stamp image and die cut if desired along with any other die cut pieces you will use for layering.


Step 4

Adhere designer die cut and finished image to the front. Decorate as desired. Now we will work with the bookmark panel.


Step 5

Cut solid card stock and designer paper to fit and attach your stamped panel,  however do not attach to the bookmark panel. If you choose to add ribbon you will punch your hole and attach now


Step 6

Attach bookmark to panel on card base. This will tear off as one entire piece once adhered to card base.


Step 7

Complete card and bookmark. Hope you enjoy this two in one gift.


Sage bookmark card

Good morning! Hope your Monday has started off fresh and new this week. Very easy peasy weekend around our house which was really nice. managed to get some stamping time in Saturday and thankfully as I had 3 Father's Day cards to get done. EEK!!! Of course this one was not one of those.  Still had not inked up Sage Advice yet from the June Release and figured it was calling out to me. I wanted to create a card with attached bookmark as a gift and it turned out just as I wanted. 


My bowl of spices is stamped on white card stock and colored with Copics. The image was cut around and dimensionals added to the back. Some designer paper is layered under the beautiful Vintage Flourishes die and some added sequins and sparkles to finish it off. Voila! 

This is the card closed with the bookmark inside. You can tuck the ribbons inside or behind when you slide it into the envelope. I really like the feel of this and know exactly who this is going to.  ;-)  


Thanks for stopping by to see me today. Hope you have a wonderful day! 


Sunday, June 21, 2015

FS437 Good Luck

This weeks Featured Stamper 437 is Lisa aka Lisa Ku. Cute gallery and I almost choose one for the kids, but I needed a guy card. As soon as I saw this Aged to Perfection card I knew that was the one to case. Kept with the masculine theme, colors and stamp. Changed the layout, papers and added candi dots and vellum. Enjoy your week Lisa. 


It has been forever since I used Lovely as A Tree from SU. This set is always a great set for the guy cards. This happens to be for one of my husband employees that moved recently. The tree has some sudoko gel pen on it to make is sparkle, but hard to see in the photo. Some faux stitching and voila! 


Saturday, June 20, 2015

Belly Band Card


Supplies

1 8 1/2 x 11 solid card stock, designer paper, scoring tool, dies, stamp, embellishements and adhesive


Step 1

Take the 8 1/2 x 11 card stock and score at 3 inches and  7 1/2 inches. Turn your paper so the shorter side is at the bottom and cut paper at 5 1/2 inches. Then turn both sheets back length wise. Set the smaller panel aside.


Step 2

Turn the main piece of card stock over and decorate as desired. Limiting the embellishments on these panels will ensure the belly band does not snag when pulled off card base


Step 3

Fold panels over to form base, set aside. Take your other panel and cut 1 inch off the length to make the belly band thinner. You can trim it down as wide as you desire. Decorate with fancy edge as desired, shown using Heart lace Border Die Light. Turn over and add designer paper if desired


Step 4

Flip the band over and place your main card base set in the middle. You will want to line up the hearts or desired edge when you fold it over for a tight enough fit to hold, yet slip off as also. The seam will be covered don't worry

Step 5

Add a panel to cover the seam and decorate. Image is I will take care of you Maya along with Twiner Die Light and rolled flowers. Below is the band removed to see card inside. Enjoy your belly band fold.


Friday, June 19, 2015

Garden Fireworks Belly band


Happy Friday and new digi day! Well technically it was on the 15th Monday, but new to someone right?  ;-)  This is the new Garden Firework digi! The color variation can be just about anything it is wonderful. 


My creation took the approach of "fireworks" with red, white and blue color combo.  ;-)  It has been forever since I created a Belly Band card and thought it would be fun especially with the colors. This designer paper has been in my stash for over a year and needed to be used. It matched pretty stinking good too so why not. After the Garden Fireworks were printed they were colored with Copics. Die cut with some Spellbinders Decorative squares. Added a few butterflies and jewel centers and finished off with some sparkle. Voila! 


Wednesday, June 17, 2015

Card Box


Supplies:

Card stock, scissors, score tool, cutting mat, decorative labels and stamp set desired


Step 1:

We are going to from a basic box base. Cut a piece of card stock 9 inches length x 7 inches width. Score a 1 inch border on all 4 sides. Pre-fold score lines.


Step 2:

Snip ends as shown, add adhesive to the tabs and fold in and adhere to form box base. This is what it should look like. Set base aside

Step 3:

Cut a piece of card stock 7 inches length x 3 inches width. Score a 1 inch border on 3 sides shown, leaving one of the length sides with just end marks scored ad shown


Step 4:

Cut the corner pieces out that are from the score lines as shown. Add decorative edge to the length panel that was not scored. Don't worry about it going over the scored edge, this will be hidden later.


Step 5:

Pre-fold score lines. Add adhesive to the 3 edges as shown. Start with the bottom edge and adhere inside the base of the box. I lightly put it in and made sure it was snug then I firmly pressed it to the box edge. 

Step 6:

Adhere the edge pieces in and decorate as desired


Step 7:

My final card box using Poppies. I added gingham paper to the box inside so when the cards are gone they have a beautiful box for decorative stuff. Enjoy!

Poppies card box

Happy Wednesday! Hope your week is going as good as mine. Of course with summer break it can't go much better. hee hee   Created a fun open faced card box today. I have a Card Box Tutorial if you want to create your very own.  ;-)  The beautiful Poppies was calling my name so that was my color choices. some orange gingham on the inside and the edges to dress them up. 


My Poppies are all cut out and around and layered for some dimension. Added stickles for sparkle as everyone could use some sparkle. A few scattered green sequins and Voila! Here is the box with some envelopes ready to be filled with cards.  


Hope you have time to play with ink and paper today! Have a wonderful day. 


Monday, June 15, 2015

Chocolate Jar of hope

Happy Monday! How is your summer going so far? Kids are out of school and one of them is finally over the silly cold and 102 temp they were running. eek... Last few days of school and he decides along with half the class to get sick? Everyone is well now, thankfully. I did get sometime to stamp with my new goodies this weekend. 


Went with a chocolate feel as the new Vintage Ephemera paper from ODBD is awesome!!!  Cut around one of the prints in the pack and layered onto the ODBD Vintage Flourish Pattern and cut a frame to pop up on dimensionals. Added a few of my new flower die cut from Birds and Nests die and some pearl centers. All with some kraft and chocolate card stock. Voila! Hope you have a wonderful day.

Sunday, June 14, 2015

FS436 Birthday Zinnias

This weeks Featured Stamper 436 is Paula aka laughingstamper. Beautiful gallery and I finally choose this Poppy Birthday card to case. I kept the over all theme of birthday, a flower and some of the sketch. Changed some of the colors and flower, changed some of the layout. Enjoy your week Paula!


Dusted off an old retired set called Zinnia's. Stamped them on white card stock and colored with Copic markers. A simple Spellbinders circle die cut for the frame and layered onto some designer paper. Wrapped some lace trim and ribbon tied into a bow. Easy Peasy! Hope you have a wonderful day!